Configure a Payment Gateway
Setting up a payment gateway is a crucial step in configuring your WHMCS installation. If you want to receive payments from your customers, you must activate at least one payment gateway.
For more information on payment gateways in WHMCS, see Payment Gateways.
In WHMCS 8.13 and later, you can also enable the PayPal Payments, Bank Transfer, and Mail In Payments payment gateway modules during initial setup at Configuration () > Getting Started Wizard.
Configure a Payment Gateway
To configure a payment gateway:
1. Go to the appropriate interface.
Go to the appropriate interface in the WHMCS Admin Area.
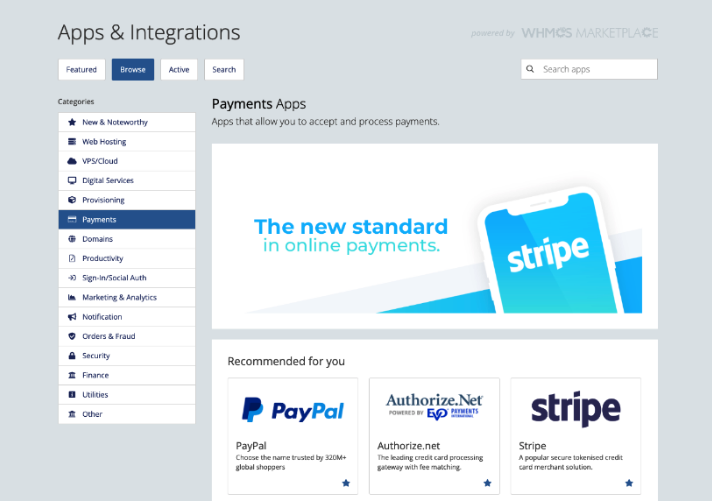
- If you use WHMCS 8.6 or later, go to Configuration () > Apps & Integrations and choose the Payments category.
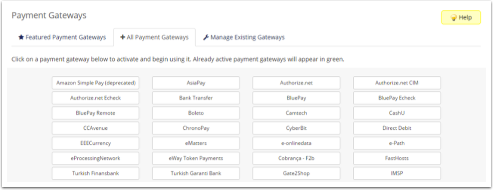
- If you use WHMCS 8.5 or earlier, go to Configuration () > System Settings > Payment Gateways and choose All Payment Gateways.
2. Find the desired payment gateway.
Find the desired payment gateway in the list (for example, Stripe) and click on it.
WHMCS includes many supported payment gateways by default, and you can find more in the WHMCS Marketplace.
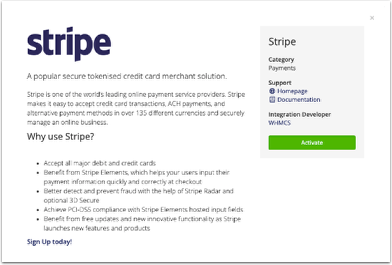
3. Activate the payment gateway.
Click Activate.
The system will redirect you to the configuration form for that payment gateway.
Each payment gateway requires its own set of credentials, which vary from gateway to gateway. For more information, see the documentation for your payment gateway module.
4. Save your changes.
Click Save Changes.
5. Repeat for each additional payment gateway.
Repeat these steps for each payment gateway you want to use.
Last modified: 2025 April 7