Schedule a Ticket Action
You can schedule automated actions for individual support tickets. This allows you to streamline your processes and provide enhanced customer service by changing ticket priority, reassigning tickets, adding notes, sending replies, and performing other actions on a scheduled date or after a set amount of time.
Schedule a Support Ticket Action
To add a new scheduled action to a support ticket:
1. View the desired support ticket.
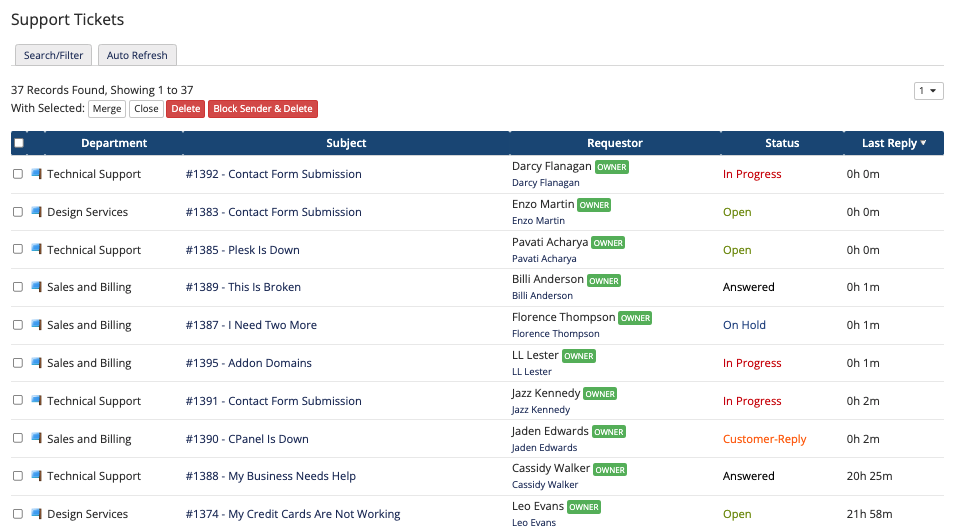
Click on the desired support ticket in the list of tickets at Support > Support Tickets.
2. Manage the ticket’s scheduled actions.
To view the list of scheduled actions for the support ticket, click on the Scheduled Actions tab. This tab lists all of the currently-scheduled actions for the ticket and their statuses.

Then, click Manage Scheduled Actions.

3. Choose an action.
In the Actions list under Scheduled Actions, choose the action that you want to schedule. Then, click Add.
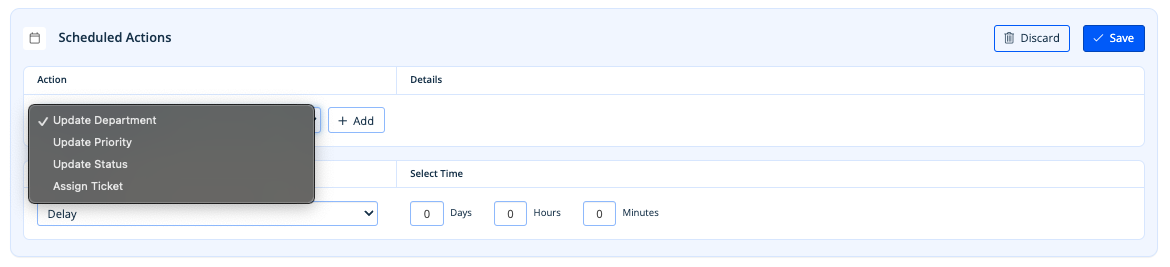
You can choose from the following actions:
| Action | Description |
|---|---|
| Pin to Top | Pin the ticket to the top of the list at Support > Support Tickets. |
| Update Department | Move the support ticket to a different support department. |
| Update Priority | Update the ticket’s priority. |
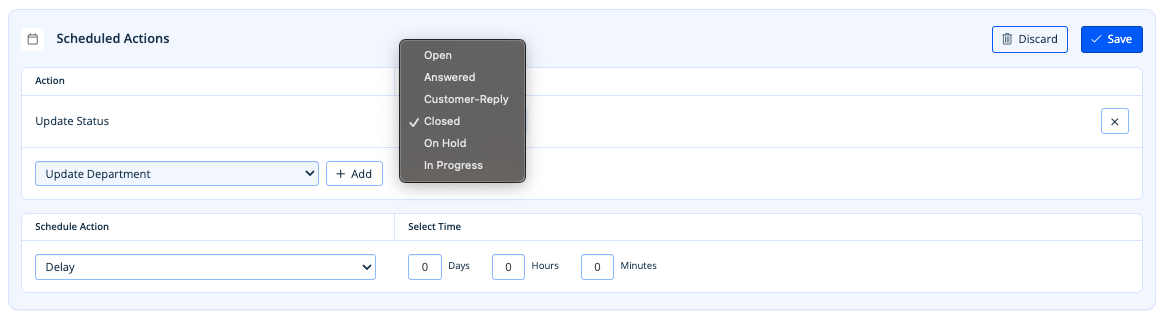
| Update Status | Update the ticket’s status. |
| Assign Ticket | Assign the ticket to an admin. If the ticket is already assigned to the selected admin at execution time, no change will occur. |
| Update Custom Field | Update the value for a support ticket custom fields. If you do not enter a new value, the scheduled action will set a blank value. |
| Add Note | Add a private admin note. |
| Add Reply | Add a ticket reply. |
4. Configure the action.
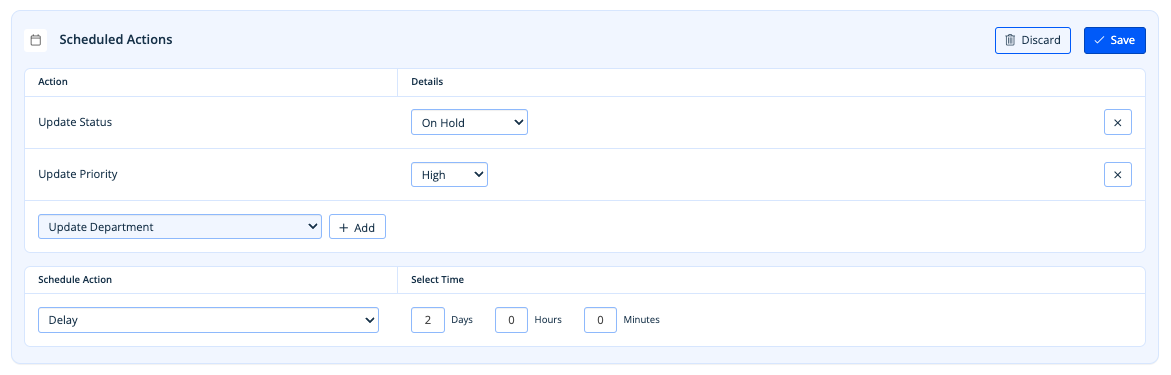
Under Details, configure the selected action. For example, if you selected Update Status, choose the status that you want to update the ticket to.
You can also choose whether to unschedule the action if someone updates the ticket before the action’s execution time occurs.
5. Add additional actions.
Repeat steps 3 and 4 to add multiple actions with the same execution time. You can add up to one of each action type.
6. Set the scheduled time.
Under Schedule Action, choose whether you want to schedule the action for a specific time or whether the action should occur after a set delay.
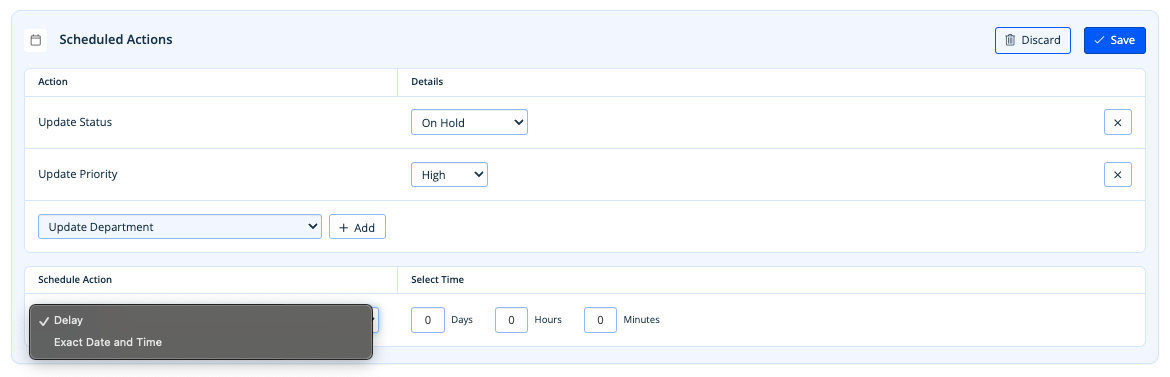
Then, under Select Time, select the date and time or set the length of the delay.
7. Save the action.
When you are finished, click Save.
The scheduled action will automatically appear in the Scheduled Actions tab’s list of actions.

The list of scheduled actions orders actions by the scheduled execution time and then, for actions with the same execution time, by the execution order.
Last modified: 2025 April 7